Enclosure Assembly: The Critical Final Step in Electronics Integration
Winnie King
When developing an electronic product, much attention is given to circuit design, component selection, and printed circuit board (PCB) fabrication. However, one of the most crucial — yet often underappreciated — stages in bringing a device to life is enclosure assembly. This final phase involves integrating all internal components, including PCBs, wiring, power supplies, and connectors, into a protective housing that defines the product’s form, function, and durability.
Far more than just a “box,” the process of electronics enclosure assembly ensures mechanical stability, environmental protection, electromagnetic compatibility (EMC), thermal management, and user safety. Whether you're building consumer gadgets, industrial control systems, medical devices, or IoT sensors, mastering this stage is essential for reliable, scalable, and compliant products.
What Is Enclosure Assembly?
At its core, enclosure assembly refers to the physical integration of electronic subassemblies into a structural housing. This includes not only placing the main PCB or PCBA (printed circuit board assembly) inside but also securing additional elements such as:
- Power supplies and batteries
- Cables, harnesses, and connectors
- Displays, buttons, switches, and other user interface components
- Heat sinks, fans, or passive cooling features
- Antennas and wireless modules
- Mounting brackets and fasteners
The enclosure itself can be made from various materials—typically plastic (e.g., ABS, polycarbonate), metal (aluminum, steel), or composite materials—depending on the application requirements for strength, weight, EMI shielding, and aesthetics.
This step transforms a collection of functional parts into a cohesive, market-ready product ready for deployment.
Why Electronics Enclosure Assembly Matters
While PCBs are the brains of any electronic system, they cannot operate reliably without proper support and protection. Here's why electronics enclosure assembly plays such a vital role:
1. Environmental Protection
Electronic circuits are sensitive to dust, moisture, temperature extremes, and chemical exposure. A well-designed enclosure provides a barrier against these hazards. For example:
- Outdoor equipment may require IP67-rated enclosures resistant to water immersion.
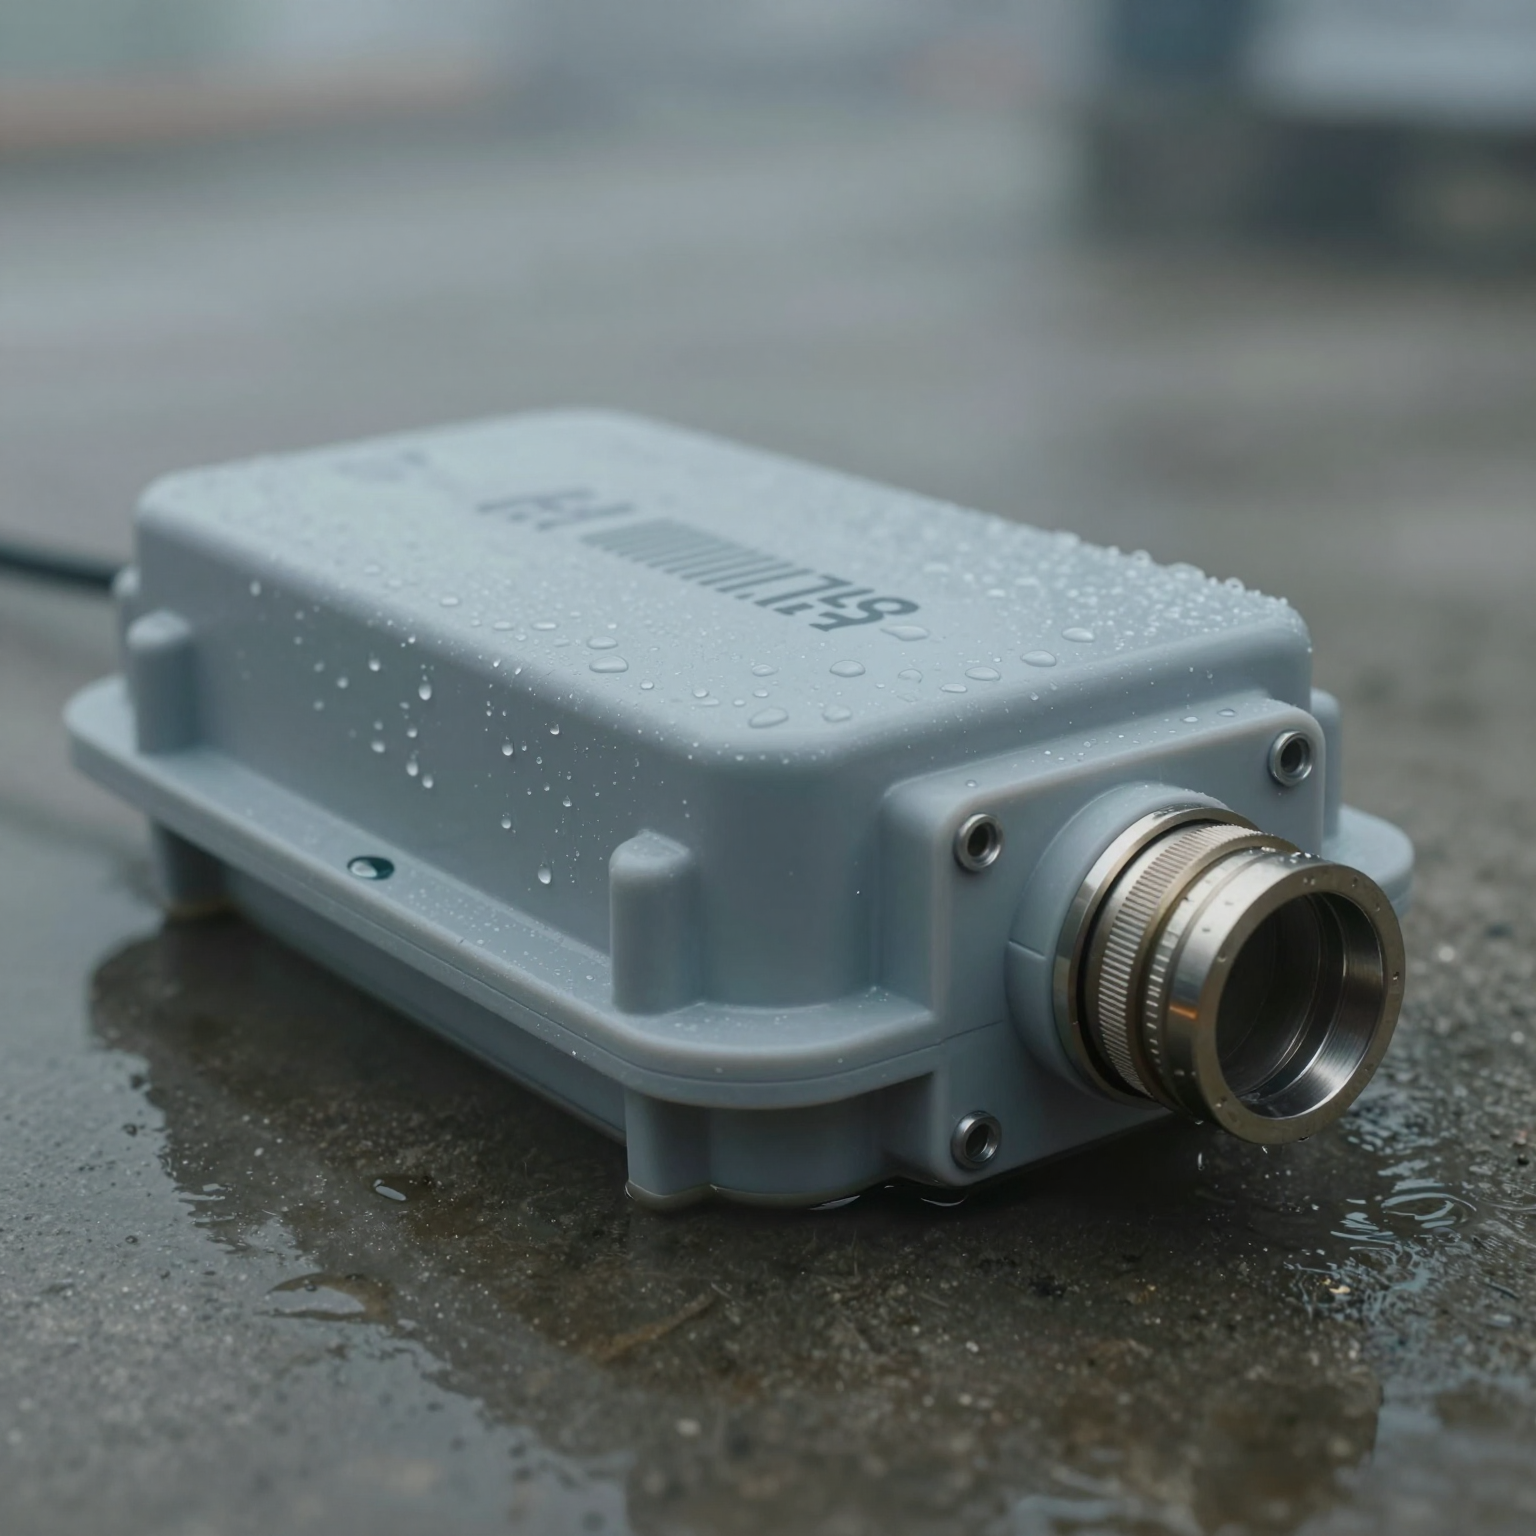
- Industrial machines need rugged housings that withstand vibration and oil splashes.
- Medical devices must meet stringent hygiene standards with smooth, cleanable surfaces.
Proper sealing gaskets, conformal coatings, and venting strategies are often incorporated during assembly to maintain protection while allowing heat dissipation.
2. Electromagnetic Interference (EMI) Shielding
In today’s connected world, electronic devices emit and are susceptible to electromagnetic noise. Metal enclosures—or conductive-coated plastic ones—act as Faraday cages, containing emissions and preventing interference with nearby devices. During enclosure assembly, attention must be paid to seams, joints, and apertures where EMI leakage could occur. Conductive gaskets, shielded cables, and grounding techniques ensure compliance
with FCC, CE, and other regulatory standards.
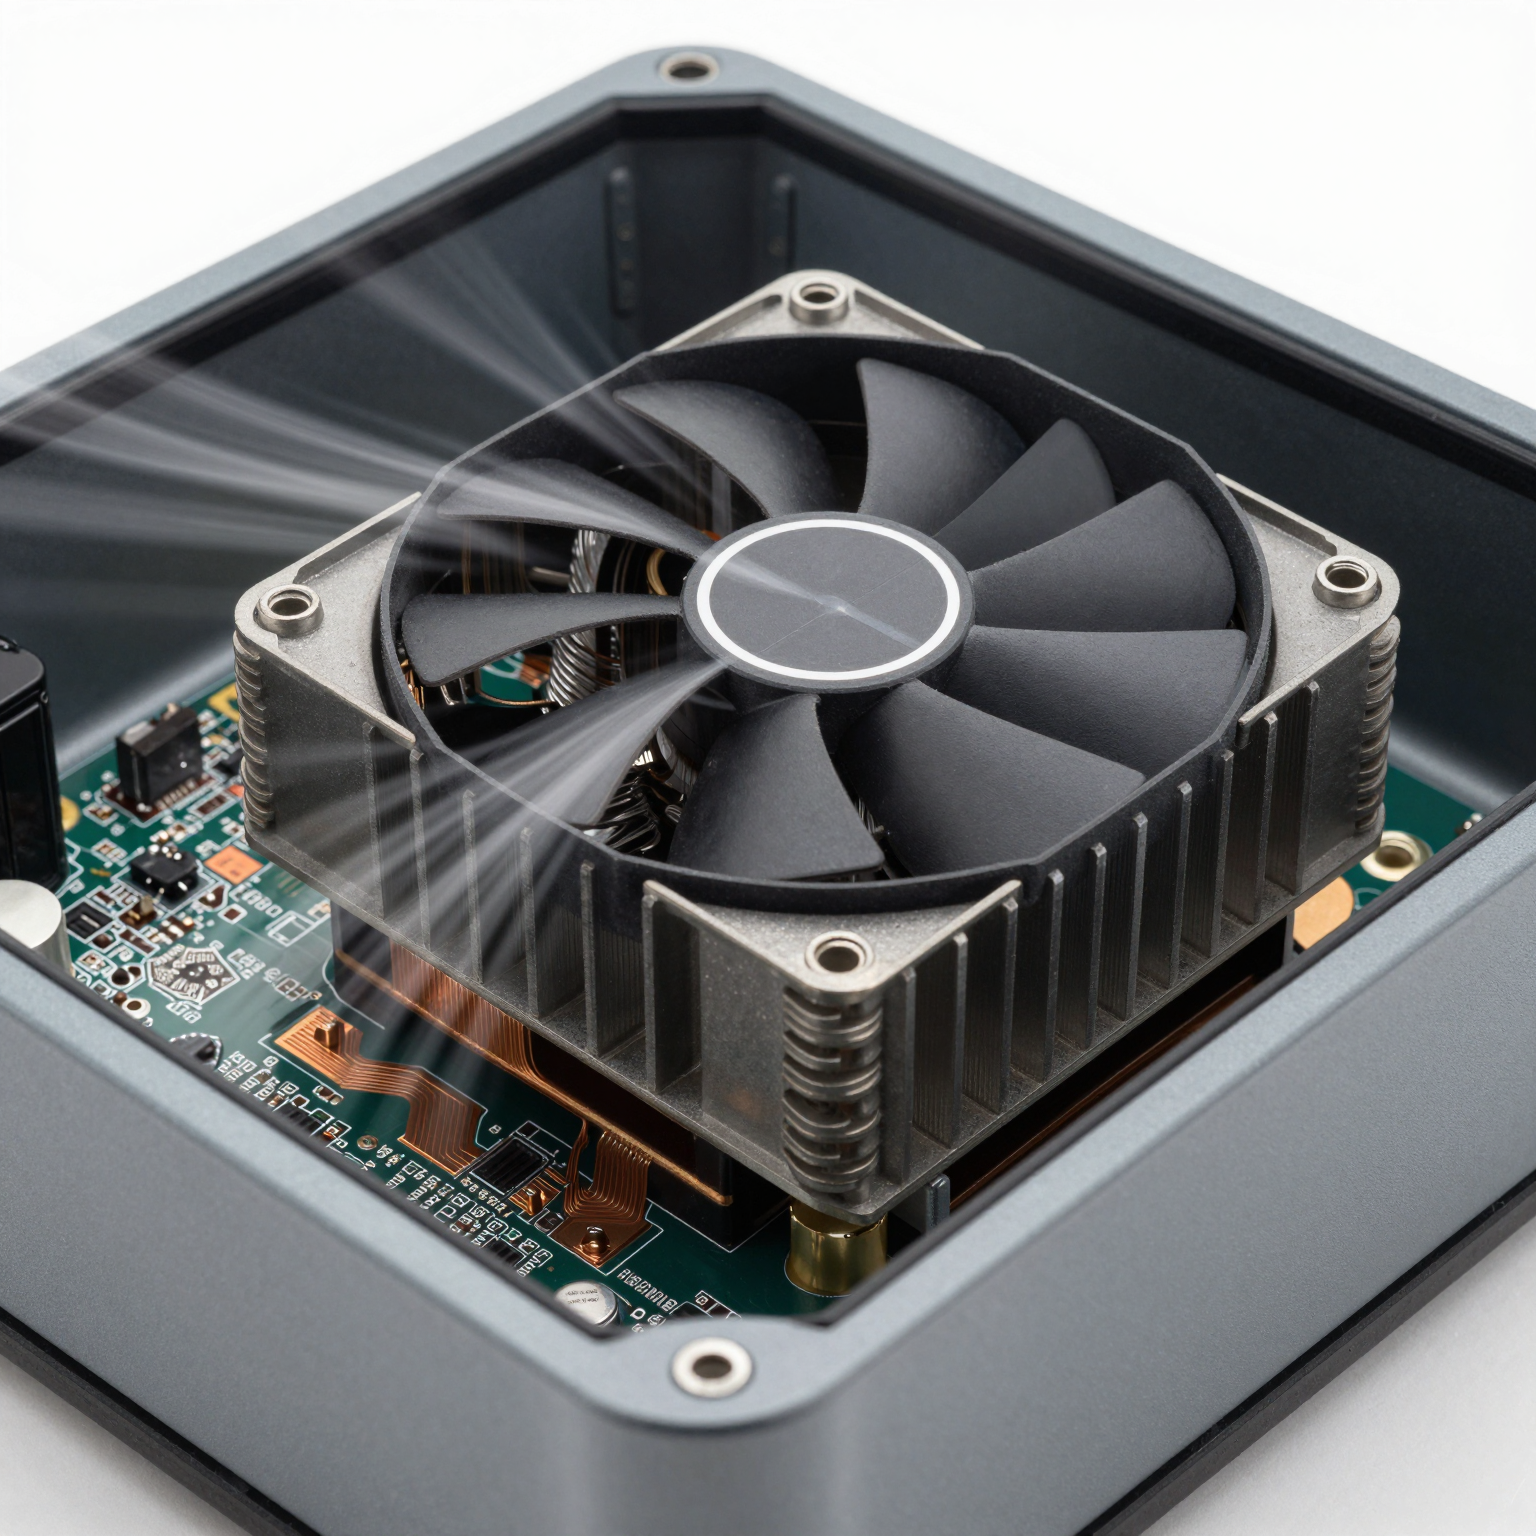
3. Thermal Management
Heat buildup can degrade performance and shorten the lifespan of electronic components. Effective electronics enclosure assembly incorporates thermal design principles such as:
- Strategic placement of vents or heat sinks
- Use of thermally conductive materials or pads
- Active cooling solutions like fans or liquid cooling loops
Ensuring airflow paths aren’t blocked by misaligned components or poorly routed wires is critical during the build process.
4. Mechanical Stability and Safety
An assembled enclosure protects delicate circuitry from physical shock, drops, and handling stress. It also prevents accidental contact with live circuits, reducing electrical shock risks. In high-voltage or industrial applications, enclosures must meet safety certifications like UL or IEC standards.
Moreover, robust mounting options—such as DIN rails, wall brackets, or chassis screws—are typically installed during assembly to facilitate field installation.
5. Aesthetic and User Experience
Beyond technical functions, the enclosure defines the product’s look and feel. Buttons, displays, LED indicators, labels, and branding elements are precisely aligned and tested during enclosure assembly. Poor fit-and-finish—like uneven gaps, loose panels, or wobbly interfaces—can undermine customer confidence, even if the underlying electronics work perfectly.
Key Steps in the Enclosure Assembly Process
A successful electronics enclosure assembly follows a structured workflow to ensure consistency, quality, and scalability. While details vary based on product complexity, the general steps include:
1. Pre-Assembly Inspection
Before inserting any components, both the PCBAs and the enclosure undergo visual and dimensional checks. This includes verifying:
- Correct PCB revision and labeling
- Presence of required hardware (standoffs, spacers)
- Cleanliness of the housing interior
- Integrity of seals and gaskets
Any discrepancies at this stage prevent downstream rework.
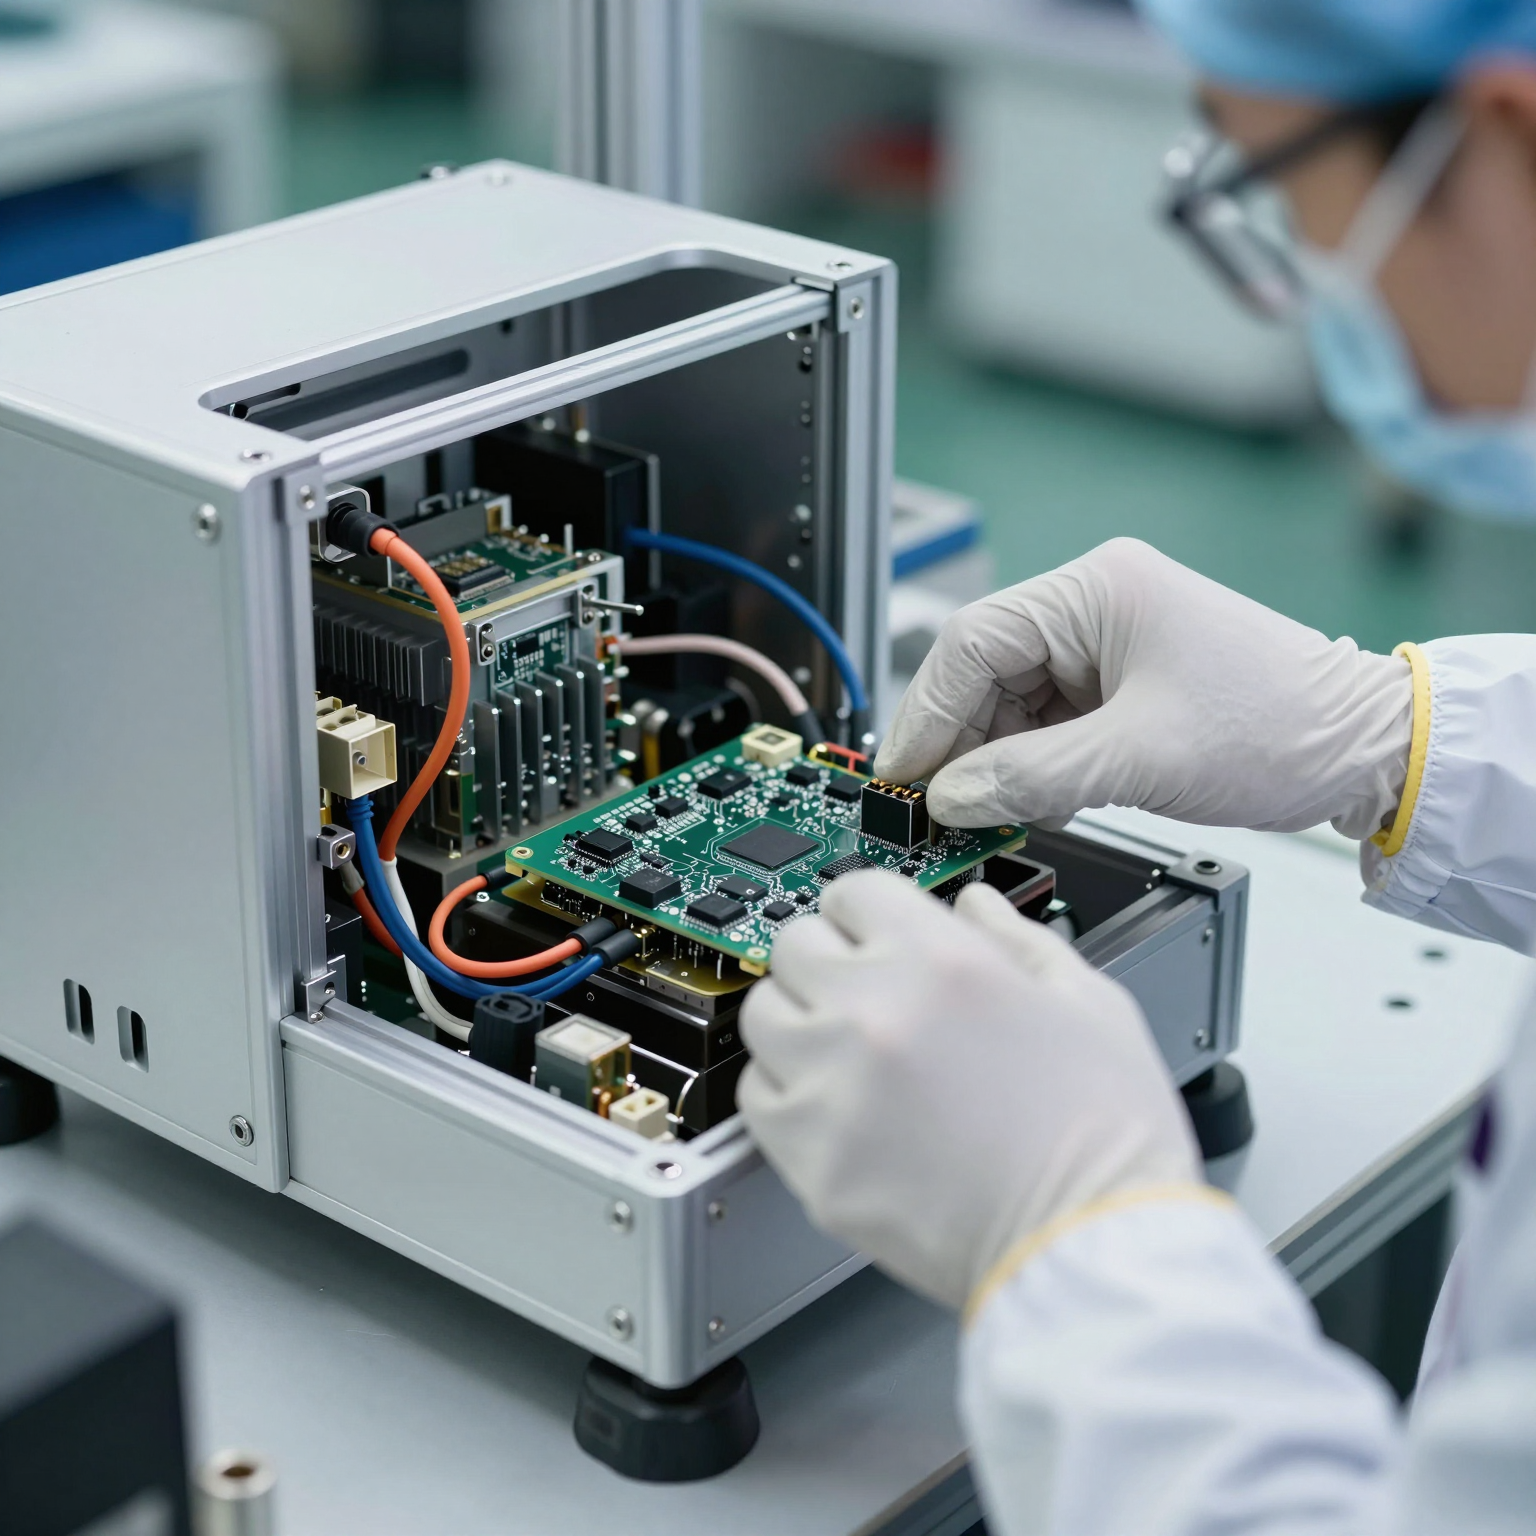
2. Component Installation
Internal components are mounted in a logical sequence:
- First, large items like power supplies or battery packs are secured.
- Then, the main PCB is fastened using screws, clips, or adhesive mounts.
- Connectors, flex cables, and ribbon wires are carefully routed and plugged in.
Torque specifications for screws and strain relief for cables are followed rigorously to avoid damage.
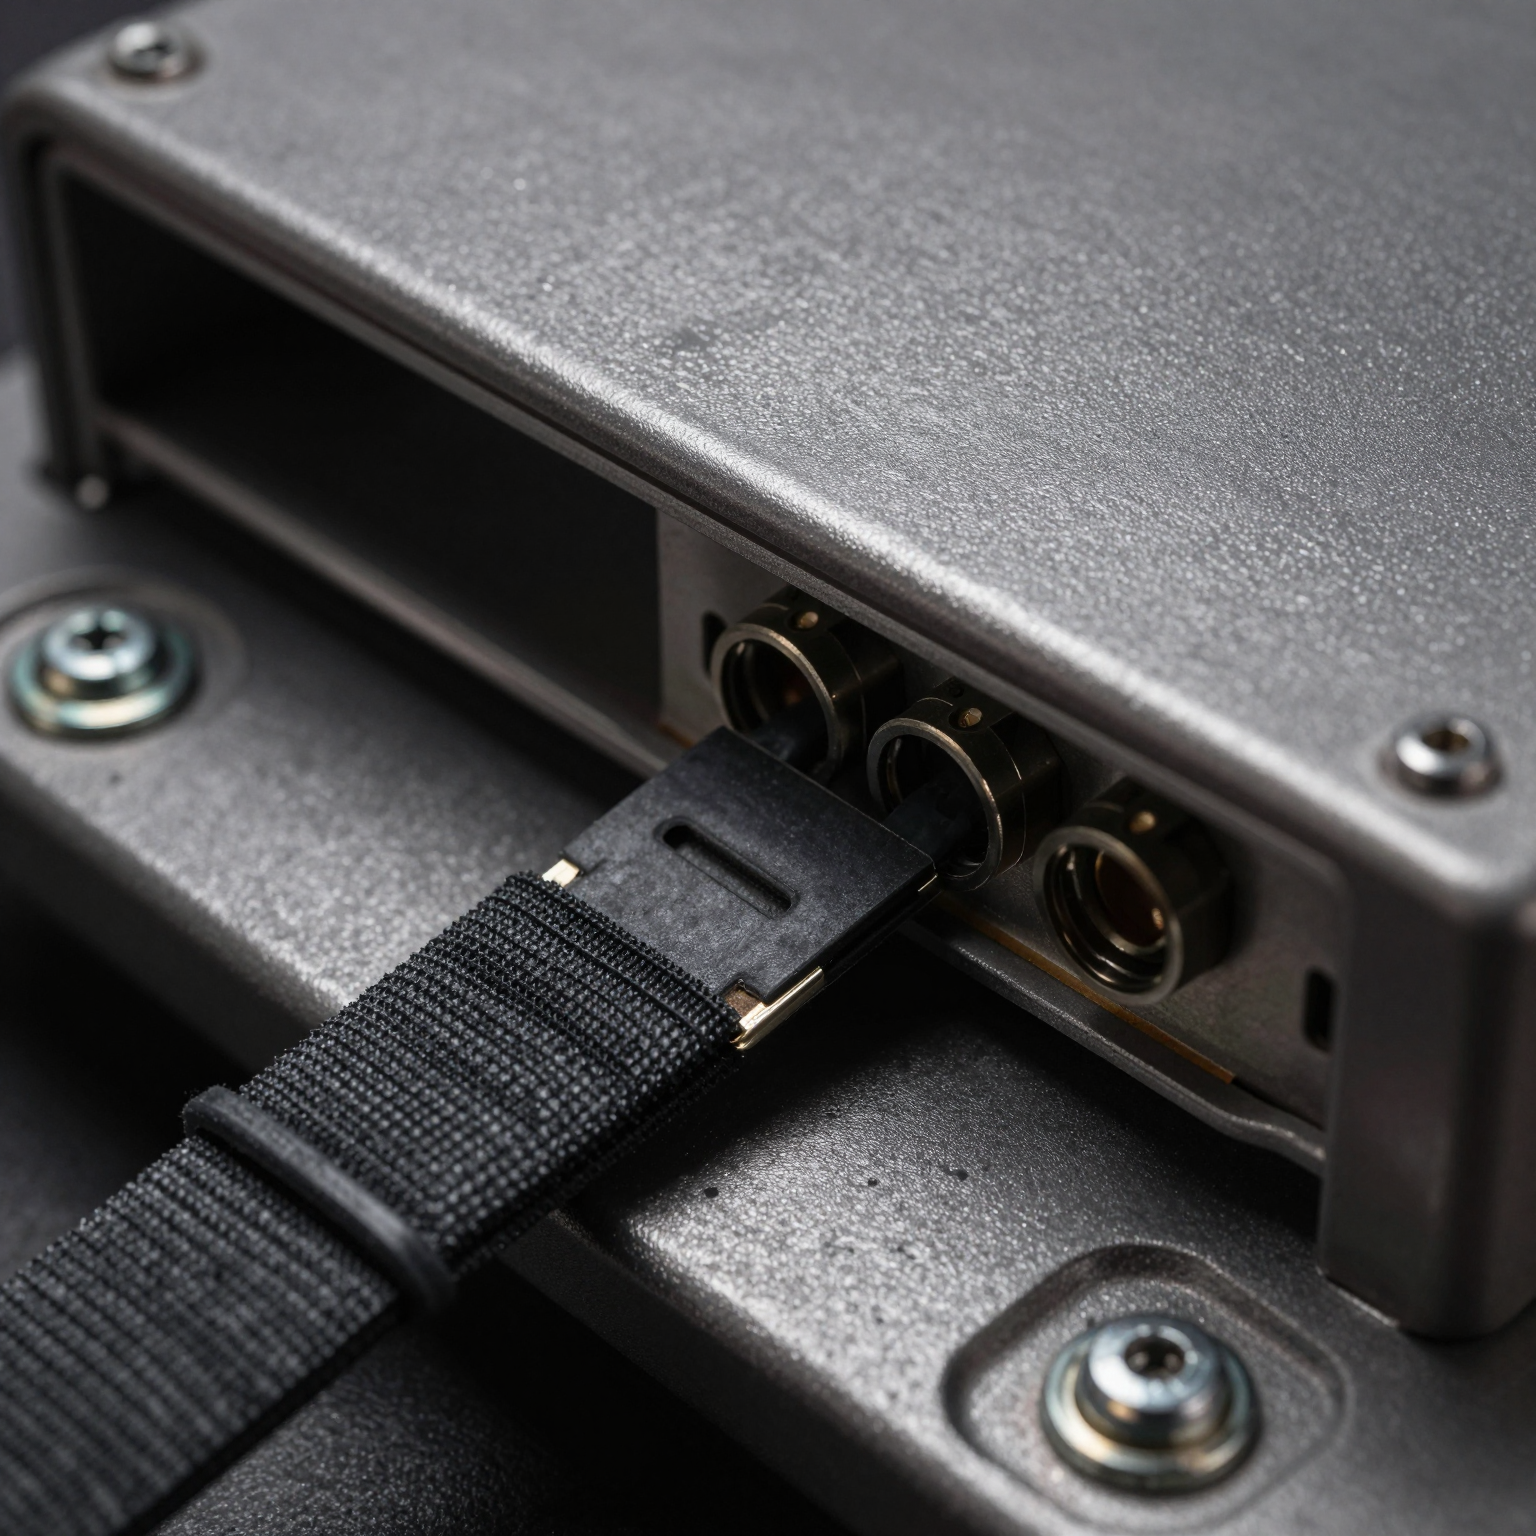
3. Wiring and Harness Integration
Cable routing is both an art and a science. Wires should be bundled neatly, secured with ties or clips, and kept away from sharp edges or moving parts. Proper labeling ensures serviceability. In complex systems, pre-assembled wire harnesses improve efficiency and reduce errors.
4. Closure and Sealing
Once all internals are installed, the enclosure halves are joined. Gaskets are compressed evenly, and fasteners are tightened in a cross-pattern to prevent warping. For waterproof designs, automated sealant dispensing or ultrasonic welding may be used instead of mechanical fasteners.
5. Functional Testing
After closure, the fully assembled unit undergoes testing:
- Power-up verification
- Signal integrity checks
- Button and display responsiveness
- Wireless connectivity (Wi-Fi, Bluetooth, etc.)
- Environmental simulation (if applicable)
Some manufacturers perform in-circuit tests (ICT) or flying probe tests before final closure to catch faults early.
6. Labeling and Packaging
Final touches include applying regulatory labels (FCC ID, CE mark), serial numbers, barcodes, and user instructions. Units are then packed securely for shipping, often with anti-static protection and cushioning.
Design Considerations for Efficient Enclosure Assembly
To streamline production and minimize errors, engineers should consider assembly requirements early in the design phase. Key best practices include:
Design for Manufacturability (DFM) and Assembly (DFA)
Collaborate with your PCB assembly services provider early to align mechanical and electrical designs. Features like standardized screw sizes, accessible test points, and modular subassemblies simplify assembly and repair.
Modular Design Approach
Break complex systems into smaller, self-contained modules (e.g., sensor board, main controller, display module). These can be pre-tested and inserted as complete units during enclosure assembly, reducing on-site troubleshooting.
Serviceability and Upgradability
Consider future maintenance. Can the enclosure be opened easily? Are replacement parts accessible? Using snap-fit covers or tool-less access panels improves service speed and reduces downtime.
Standardization
Use common enclosure platforms across product lines when possible. This reduces inventory costs, simplifies training, and speeds up changeovers on the production line.
Common Challenges in Enclosure Assembly
Despite careful planning, several issues can arise during electronics enclosure assembly:
Misalignment of Components
Poor tolerancing between PCB cutouts and enclosure features can lead to binding or stress on solder joints. Always allow for slight dimensional variations due to material shrinkage or thermal expansion.
Cable Strain and Pinching
Improper routing can cause wires to get pinched when the case closes, leading to intermittent connections or shorts. Include cable retention clips and strain reliefs in the design.
Grounding Issues
Inconsistent grounding between the PCB and metal enclosure can create ground loops or EMI problems. Ensure solid electrical contact through dedicated grounding tabs or conductive washers.
Overheating Due to Poor Ventilation
Blocking air intakes with misplaced components or excessive foam padding can trap heat. Perform thermal simulations and prototype builds to validate airflow.
Automation vs. Manual Assembly
Depending on volume and complexity, enclosure assembly can be performed manually, semi-automatically, or fully automatically.
- Low-volume or prototype runs often use manual labor for flexibility.
- High-volume production benefits from automation such as robotic screwdrivers, vision-guided part placement, and automated optical inspection (AOI).
- Semi-automated lines combine human dexterity with machine precision for tasks like cable insertion or label application.
Automation improves throughput and consistency but requires higher upfront investment and longer setup times.
Choosing the Right Partner for Your Enclosure Assembly Needs
For many companies—especially startups or OEMs without in-house manufacturing capabilities—outsourcing electronics enclosure assembly to a qualified contract manufacturer makes strategic sense.
Look for partners who offer:
- End-to-end integration from PCB fabrication to final box build
- Expertise in multiple industries (medical, automotive, industrial)
- Strong quality control processes (e.g., ISO 13485, IPC-A-610)
- Capabilities in component sourcing, testing, and logistics
A trusted partner will collaborate on design reviews, suggest improvements, and scale production smoothly from prototypes to mass manufacturing.
If you're looking for a reliable solution, explore comprehensive PCB assembly services that include full system integration and enclosure build capabilities.
Conclusion
Enclosure assembly is far more than just putting a cover on a circuit board—it's the culmination of meticulous engineering, precise manufacturing, and thoughtful design. When done right, it delivers a product that is not only functional and durable but also safe, compliant, and aesthetically pleasing.
As electronic devices become increasingly compact, interconnected, and deployed in harsh environments, the importance of professional electronics enclosure assembly continues to grow. By understanding its role, following best practices, and partnering with experienced manufacturers, businesses can bring higher-quality products to market faster and more efficiently.
Whether you're developing a smart home device or an industrial automation controller, never underestimate the power of a well-executed enclosure. It’s the final piece that turns technology into a real-world solution.